Pav Bhaji – the very name conjures up images of bustling Mumbai streets, the aroma of spices mingling with butter, and the satisfying warmth of a flavorful meal. This iconic Indian street food, born in the textile mills of Mumbai as a quick and affordable lunch, has captured hearts (and stomachs!) across the nation and beyond. Now, you can bring that authentic Mumbai experience into your own kitchen with our comprehensive guide to making the perfect pav bhaji recipe.
This super pillar guide will walk you through every step, from understanding the essential ingredients to mastering the cooking techniques. We'll also explore exciting variations and helpful tips to customize your pav bhaji to your liking. Get ready to embark on a culinary adventure that will transport you straight to the vibrant streets of Mumbai!
What Makes Pav Bhaji So Irresistible? Unveiling the Magic
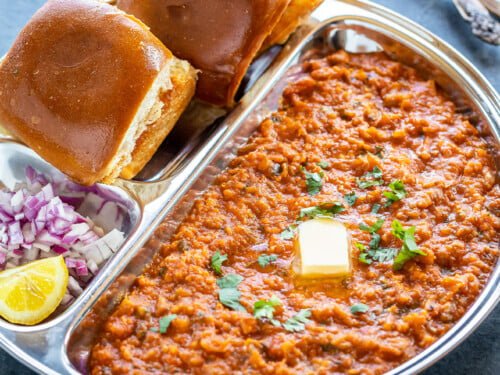
Pav Bhaji is more than just a dish; it’s an experience. It's a symphony of flavors and textures, a celebration of simple ingredients transformed into something extraordinary. The "bhaji," a mashed vegetable curry cooked in a symphony of spices and, of course, plenty of butter, is the heart of the dish. Paired with "pav," soft bread rolls toasted in butter on a hot griddle, it’s a match made in culinary heaven.
The magic lies in the balance – the tangy tomatoes, the earthy vegetables, the complex blend of spices, and the richness of the butter all come together to create a dish that is both comforting and exciting. And because you control the ingredients, you can adjust the spice level to suit your taste.
From Pantry to Plate: Gathering Your Pav Bhaji Essentials
Before you start cooking, ensure you have all the necessary ingredients. Here’s a general list, but feel free to adapt it based on your preferences:
- For the Bhaji:
- Potatoes: 3 medium-sized, boiled and mashed
- Cauliflower: 1 cup, finely chopped
- Green peas: ½ cup
- Carrots: 1 medium, finely chopped
- Capsicum (Bell pepper): 1 medium, finely chopped
- Onions: 2 medium, finely chopped
- Tomatoes: 3 large, finely chopped
- Ginger-garlic paste: 1 tbsp
- Green chilies: 1-2, finely chopped (optional)
- Pav Bhaji masala: 2 tbsp (See our guide below for homemade options!)
- Red chili powder: 1 tsp
- Turmeric powder: ½ tsp
- Salt: to taste
- Butter: 3-4 tbsp (Amul butter recommended)
- Oil: 2 tbsp
- Water: as needed
- Fresh coriander (cilantro): for garnish
- Lemon wedges: to serve
- Chopped onions: for topping
- For the Pav:
- Pav (bread rolls)
Building Blocks of Flavor: Mastering the Pav Bhaji Recipe
Now that you have your ingredients ready, let's dive into the step-by-step process of making this delicious dish.
- Prepping the Vegetables:
- Boil the potatoes until soft. Let them cool slightly and then mash them well.
- Optionally, boil or steam other vegetables like cauliflower, carrots, and peas until tender. You can also finely chop them and add them directly to the pan later. Many find that boiling the vegetables beforehand makes for a smoother, more uniform final texture.
- Creating the Aromatic Base:
- Heat oil and 2 tablespoons of butter in a large pan or tawa (a flat griddle).
- Add chopped onions and sauté until golden brown. The key to a flavorful bhaji is a well-caramelized onion base.
- Add ginger-garlic paste and sauté for a minute until the raw smell disappears.
- Add chopped green chilies (if using) and capsicum. Cook for 2-3 minutes.
- Add chopped tomatoes and cook until they turn mushy and oil starts separating. This step is crucial for creating the tangy and rich gravy.
- Add pav bhaji masala, red chili powder, turmeric powder, and salt. Sauté for a few minutes, allowing the spices to release their aroma. If you want to try making your spice blend from scratch, check out our pav bhaji masala recipe for a detailed guide.
- Unleashing the Flavors: Cooking the Bhaji:
- Add the mashed potatoes and other cooked vegetables to the masala base.
- Mix everything thoroughly, continuously mashing with a spatula or masher to achieve a smooth consistency.
- Add water as needed to adjust the consistency. Simmer for 10-12 minutes, stirring occasionally, allowing the flavors to meld together.
- Finish with 1 tablespoon of butter and freshly chopped coriander before turning off the heat.
- The Perfect Partner: Toasting the Pav:
- Slit the pav buns horizontally.
- Heat butter on a tawa. Optionally, sprinkle some pav bhaji masala for added flavor.
- Toast the pav buns until they are golden and crispy.
Beyond the Basics: Customizing Your Pav Bhaji
The beauty of pav bhaji lies in its versatility. Feel free to experiment and create your own signature version. Here are a few ideas to get you started:
- Cheese Pav Bhaji: Add grated cheese on top of the bhaji for a cheesy twist.
- Paneer Pav Bhaji: Add crumbled paneer (Indian cheese) to the bhaji for a protein-rich version.
- Jain Pav Bhaji: Skip onions and garlic. Use raw bananas instead of potatoes.
- Khada Pav Bhaji: Keep the vegetables chunky rather than mashing them completely.
Pro Tips for Pav Bhaji Perfection
- Don't skimp on the butter: It gives pav bhaji its signature taste.
- Quality Masala Matters: Pav Bhaji masala is key – use a good-quality brand or make it at home.
- Add a Zest: For an extra zing, add a bit of kasuri methi (dried fenugreek leaves) toward the end.
- Frozen Veggies are Fine: Yes, frozen peas and mixed veggies work well. Just ensure they’re cooked properly and mashed well.
Storing and Reheating: Making the Most of Your Leftovers
- Store leftover bhaji in an airtight container in the refrigerator for up to 2 days.
- Reheat in a pan with a little butter or microwave before serving.
- Toast fresh pav when ready to eat for that perfect crispy-soft texture.
Nutritional Information (Approximate per serving):
- Calories: 380 kcal
- Carbohydrates: 45g
- Protein: 8g
- Fat: 18g
- Fiber: 7g
The Takeaway: Your Pav Bhaji Journey Begins Now!
Making pav bhaji at home is not only easy but also incredibly rewarding. You get to control the ingredients, adjust the spice level, and create a dish that is perfectly tailored to your taste. So, gather your ingredients, put on some music, and get ready to experience the magic of Mumbai street food in your own kitchen.
