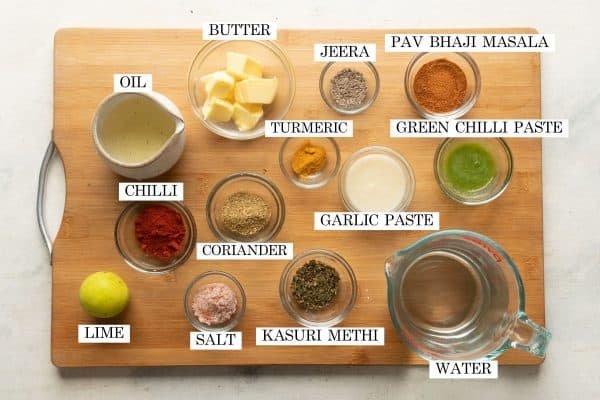
Craving that irresistible Mumbai street food, Pav Bhaji? The secret to its authentic flavor lies in the Pav Bhaji Masala. But store-bought versions can be bland or too spicy. Learning how to make pav bhaji with a homemade masala ensures a burst of fresh, vibrant flavors tailored to your taste.
At a glance:
- Learn to create a custom Pav Bhaji Masala blend at home for a signature taste.
- Discover the crucial roasting techniques that unlock the spices' aromatic potential.
- Understand how to adjust the spice levels to suit your preference.
- Get expert tips on storage to maintain the freshness and potency of your homemade masala.
- Explore alternative uses for your Pav Bhaji Masala beyond just Pav Bhaji.
- Troubleshoot common issues like clumping or bitterness in your spice blend.
Why Bother Making Your Own Pav Bhaji Masala?
Sure, you can buy pre-made Pav Bhaji Masala at most Indian grocery stores. But there are compelling reasons to craft your own:
- Control over Ingredients: You know exactly what's going into your masala – no artificial colors, preservatives, or excessive salt.
- Freshness: Homemade spice blends are far more aromatic and flavorful than store-bought ones that have been sitting on shelves for months.
- Customization: You can adjust the spice levels to your liking. Love heat? Add more chilies. Prefer a milder flavor? Reduce them.
- Cost-Effective: Buying whole spices in bulk and grinding them yourself is often cheaper than purchasing pre-made blends.
- A Culinary Adventure: Making your own masala is a fun and rewarding culinary experience.
Deconstructing the Pav Bhaji Masala: The Essential Elements
Pav Bhaji Masala is a complex blend of spices, each contributing its unique flavor profile. Understanding these components is the first step to creating your perfect blend. The core elements include:
- Coriander Seeds: Adds a warm, citrusy, and earthy note, forming the base of the masala.
- Cumin Seeds: Provides a smoky, earthy flavor with a slightly bitter edge.
- Dried Red Chilies: Contribute heat and color. Kashmiri chilies are often preferred for their vibrant color and mild heat.
- Black Cardamom: Imparts a smoky, resinous aroma, adding depth and complexity.
- Cloves: Offer a warm, pungent, and slightly sweet flavor.
- Cinnamon: Provides a sweet, woody, and aromatic note. Ceylon cinnamon is preferred for its delicate flavor.
- Fennel Seeds: Add a sweet, licorice-like flavor.
- Black Peppercorns: Contribute heat and a pungent flavor.
- Dried Ginger Powder (Sonth): Adds a warm, slightly spicy, and pungent flavor. It also acts as a tenderizer.
- Dried Mango Powder (Amchur): Provides a tangy, sour flavor.
- Turmeric Powder: Adds color and a slightly earthy flavor.
- Black Salt (Kala Namak): Contributes a unique savory, sulfurous flavor.
Some recipes also include star anise, mace, nutmeg, bay leaf, and asafoetida (hing) for added complexity.
Perfecting the Roasting Technique: The Key to Aromatic Bliss
Roasting the spices is crucial for unlocking their full potential and intensifying their flavors. Here's a step-by-step guide:
- Choose Your Pan: Opt for a heavy-bottomed pan or skillet to ensure even heat distribution.
- Low and Slow: Roast the spices on low heat to prevent burning. Burnt spices will result in a bitter-tasting masala.
- Individual Roasting (Recommended): For best results, roast each spice individually, as they have different roasting times. This ensures that each spice is perfectly toasted.
- Constant Stirring: Keep stirring the spices constantly to prevent them from burning.
- Aromatic Cues: Roast until the spices release their aroma and become slightly darker in color. Be careful not to over-roast.
- Cool Completely: Allow the roasted spices to cool completely before grinding. Grinding hot spices can create a paste-like consistency.
Example: Cumin seeds will take less time to roast than coriander seeds. Red chilies need to be roasted carefully to avoid burning and releasing too much heat.
Pro Tip: If you live in a humid climate, you can dry-roast the spices for a longer time to remove any excess moisture and extend the shelf life of your masala.
Grinding and Blending: Achieving the Perfect Texture
Once the spices are roasted and cooled, it's time to grind them into a fine powder. Here's how:
- Use a High-Powered Grinder: A spice grinder, coffee grinder (dedicated to spices only), or a high-powered blender works best.
- Grind in Batches (If Necessary): If your grinder is small, grind the spices in batches to ensure even grinding.
- Avoid Overheating: Grind in short bursts to prevent the spices from overheating, which can affect their flavor.
- Sift (Optional): For a super-fine powder, sift the ground spices through a fine-mesh sieve and re-grind any larger particles.
- Blend with Powders: Mix the ground spices with dried ginger powder, dried mango powder, turmeric powder, and black salt.
- Mix Thoroughly: Ensure all the ingredients are thoroughly mixed for a uniform flavor.
Pav Bhaji Masala Recipe: A Customizable Template
Here's a basic recipe that you can adjust to your liking:
- 1/4 cup Coriander Seeds
- 2 tbsp Cumin Seeds
- 5-6 Dried Red Chilies (Kashmiri for milder heat)
- 4 Black Cardamoms
- 1 tbsp Cloves
- 1 inch Cinnamon Stick
- 1 tbsp Fennel Seeds
- 1 tsp Black Peppercorns
- 1/2 tsp Dried Ginger Powder
- 1 tbsp Dried Mango Powder
- 1/2 tsp Turmeric Powder
- 1 tsp Black Salt
Follow the roasting and grinding instructions above to create your homemade Pav Bhaji Masala. You can explore and Make Mumbai's Favorite Spice Blend using other flavor profiles tailored to you.
Adjusting the Spice Levels: A Balancing Act
Finding the right balance of heat, tang, and aroma is key to creating a perfect Pav Bhaji Masala. Here's how to adjust the spice levels:
- For More Heat: Add more dried red chilies or black peppercorns. You can also use hotter varieties of chilies, such as cayenne pepper.
- For Milder Heat: Use Kashmiri or Byadgi chilies, which have a vibrant color but mild heat. You can also reduce the number of chilies or remove the seeds before roasting.
- For More Tang: Add more dried mango powder (amchur). You can also add a pinch of citric acid for an extra zing.
- For More Aroma: Add more cardamom, cloves, or cinnamon. You can also experiment with other aromatic spices, such as star anise or mace.
Example: If you're making Pav Bhaji for kids, use only 1-2 Kashmiri chilies and omit the black peppercorns.
Storage Secrets: Keeping Your Masala Fresh
Proper storage is essential for maintaining the freshness and potency of your homemade Pav Bhaji Masala. Here are some tips:
- Airtight Container: Store the masala in an airtight glass jar or container.
- Cool, Dark Place: Keep the container in a cool, dark, and dry place, away from direct sunlight and heat.
- Avoid Moisture: Ensure the container is completely dry before storing the masala. Moisture can cause the masala to clump or spoil.
- Refrigerator Storage (Optional): For longer shelf life, you can store the masala in the refrigerator.
- Shelf Life: Homemade Pav Bhaji Masala typically lasts for 2-3 months at room temperature and up to 6 months in the refrigerator.
Pro Tip: To prevent clumping, you can add a few grains of rice to the container. The rice will absorb any excess moisture.
Beyond Pav Bhaji: Unleashing Versatility
While Pav Bhaji Masala is primarily used for making Pav Bhaji, its versatile flavor profile makes it a great addition to other dishes. Here are some ideas:
- Tawa Pulao: Add a spoonful of Pav Bhaji Masala to Tawa Pulao for a flavorful twist.
- Masala Pav: Use it to spice up Masala Pav, another popular Mumbai street food.
- Vegetable Stir-Fries: Sprinkle it on vegetable stir-fries for an extra boost of flavor.
- Egg Bhurji: Add it to Egg Bhurji for a spicy and aromatic breakfast.
- Marinades: Use it as a marinade for paneer, chicken, or vegetables before grilling or roasting.
- Soups and Stews: Add it to soups and stews for a complex and flavorful base.
Troubleshooting Your Masala: Common Issues and Solutions
- Masala is Clumpy: This is usually due to moisture. Ensure the spices are completely dry before grinding and store the masala in an airtight container with a few grains of rice.
- Masala is Bitter: This is often caused by over-roasting the spices. Roast the spices on low heat and stir constantly to prevent burning.
- Masala is Not Aromatic Enough: This could be due to using old or stale spices. Use fresh, high-quality spices and roast them properly to release their aroma.
- Masala is Too Spicy: Reduce the number of dried red chilies or use milder varieties. You can also remove the seeds before roasting.
- Masala is Lacking Tang: Add more dried mango powder (amchur) or a pinch of citric acid.
Quick Answers: Addressing Common Questions
Q: Can I use pre-ground spices instead of whole spices?
A: While you can, using whole spices and grinding them yourself will result in a much fresher and more flavorful masala.
Q: Can I skip the roasting step?
A: Roasting is crucial for developing the flavor and aroma of the spices. Skipping this step will result in a bland and less flavorful masala.
Q: Can I make a large batch of Pav Bhaji Masala and store it for later?
A: Yes, you can. Just make sure to store it in an airtight container in a cool, dark place or in the refrigerator to maintain its freshness.
Q: I don't have all the spices listed in the recipe. Can I still make Pav Bhaji Masala?
A: You can adjust the recipe based on what you have available. However, try to include the core spices, such as coriander seeds, cumin seeds, dried red chilies, and dried mango powder, for an authentic flavor.
Your Pav Bhaji Masala Playbook: A Quick Start
Ready to create your signature Pav Bhaji Masala? Here's a quick guide:
- Gather Your Spices: Start with fresh, high-quality whole spices.
- Roast with Care: Roast each spice individually on low heat until aromatic.
- Grind to Perfection: Grind the roasted spices into a fine powder using a spice grinder or blender.
- Blend and Season: Mix the ground spices with dried ginger powder, dried mango powder, turmeric powder, and black salt. Adjust the spice levels to your liking.
- Store Properly: Store the masala in an airtight container in a cool, dark place or in the refrigerator.
- Experiment and Enjoy: Use your homemade Pav Bhaji Masala to create delicious Pav Bhaji and other flavorful dishes!
Making your own Pav Bhaji Masala takes a little effort, but the reward is a truly authentic and delicious flavor that you can customize to your exact preferences. Get creative, experiment with different spice combinations, and enjoy the process of creating your signature blend!
